Avatar Tutorial by tishalook
For Adobe Photoshop 7 and Adobe ImageReady

- We'll be working with this image from Marapets so download it to your computer.
-
Open the above image in Adobe Photoshop 7. Choose Image > Mode > RGB.
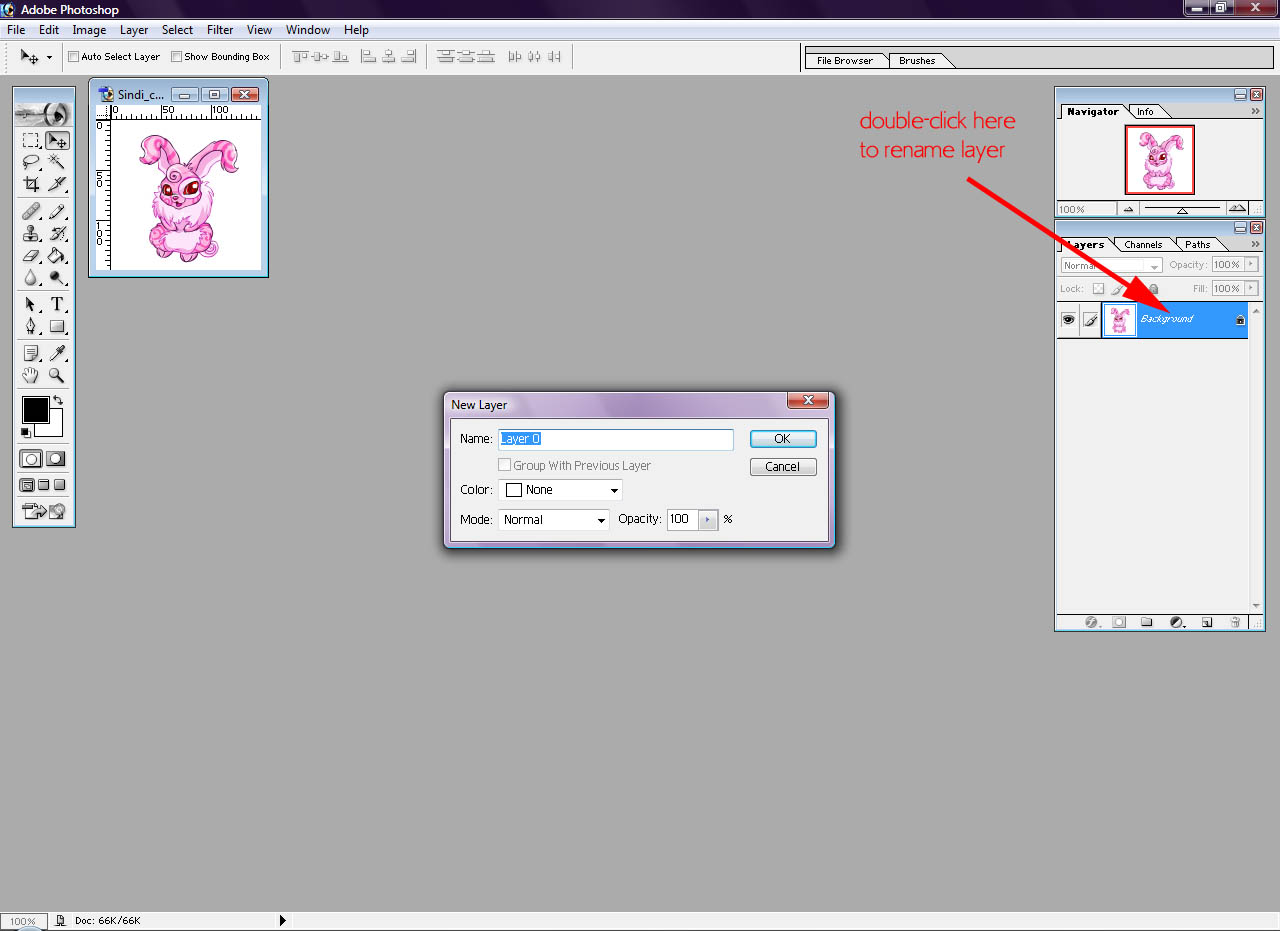
Double-click on the Background layer in the layers palette and rename it CC Sindi. (You can click on any screenshot to see it full-size)
-
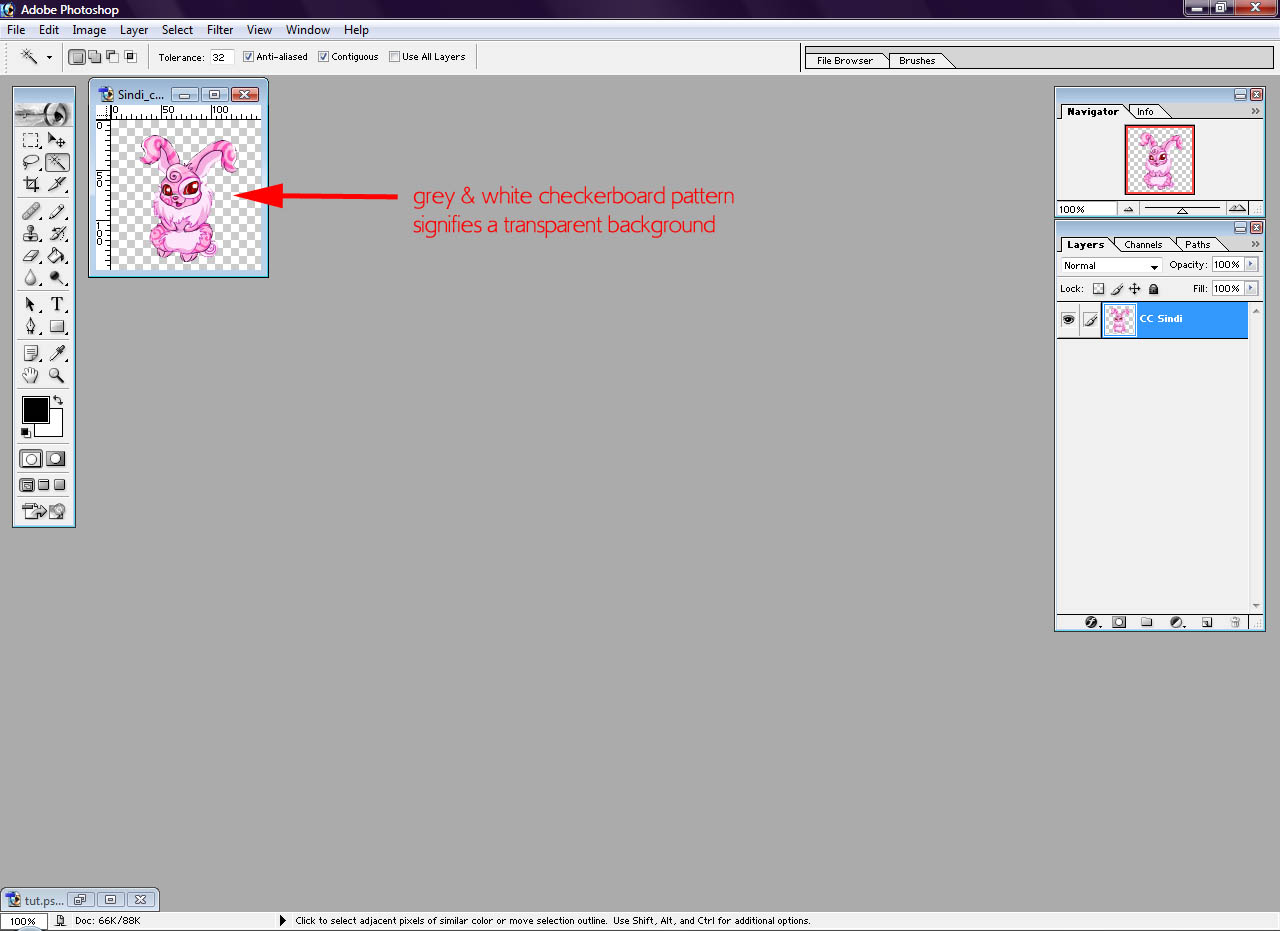
Using the Magic Wand tool, click anywhere in the white background of the image. Go to Edit > Cut.
You should now have a Cotton Candy Sindi on a transparent background.
-
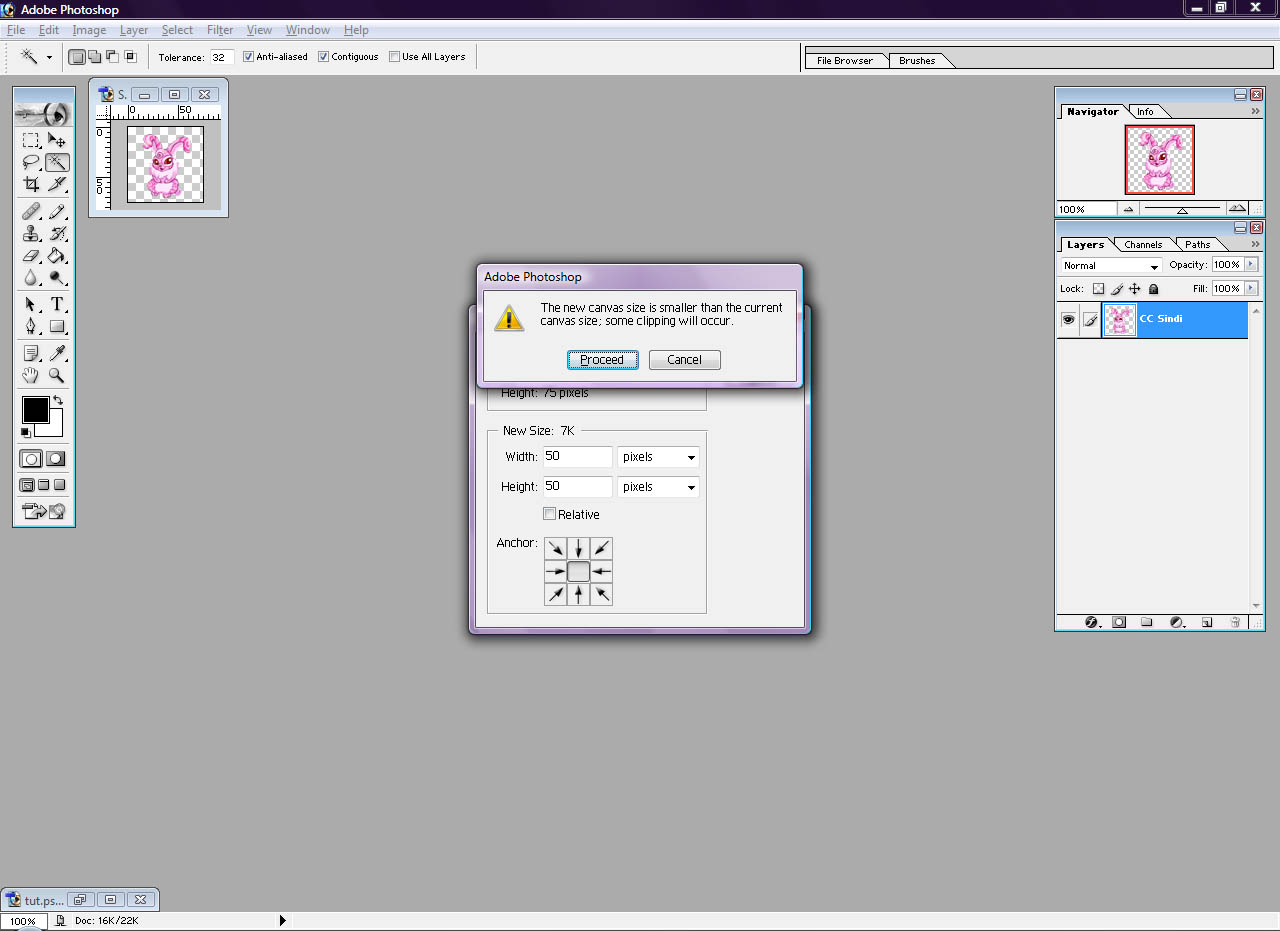
Go to Image > Size and change the size from 150x150 to 75x75. Then
go to Image > Canvas Size and change the size to 50x50. You will get
a warning box alerting you to the fact some clipping may occur. Click Proceed.
-
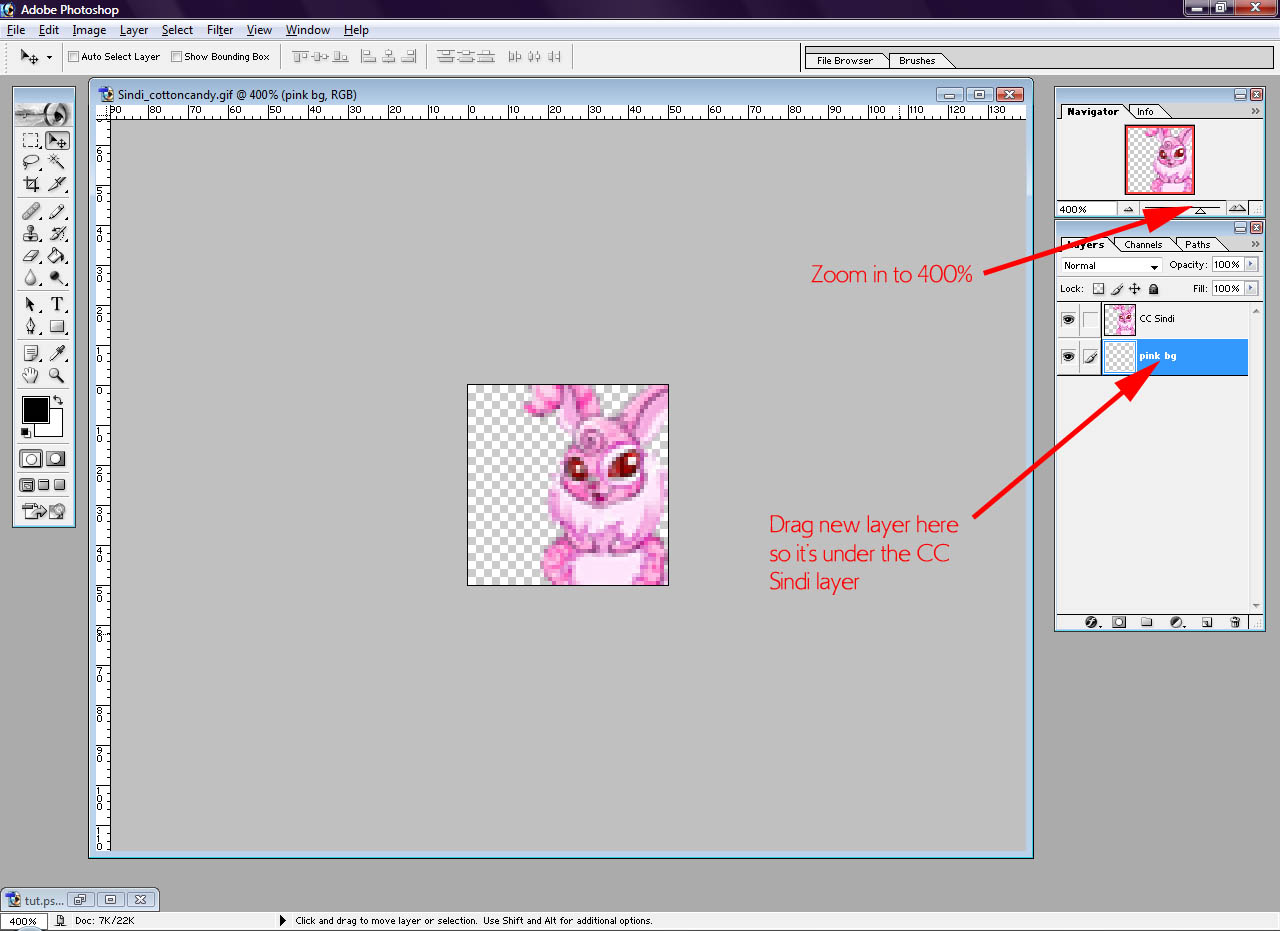
Zoom in to 400% and move the Sindi to the right. Create a new layer and name it pink bg.
Move the new layer to the bottom so it's under the CC Sindi layer.
-
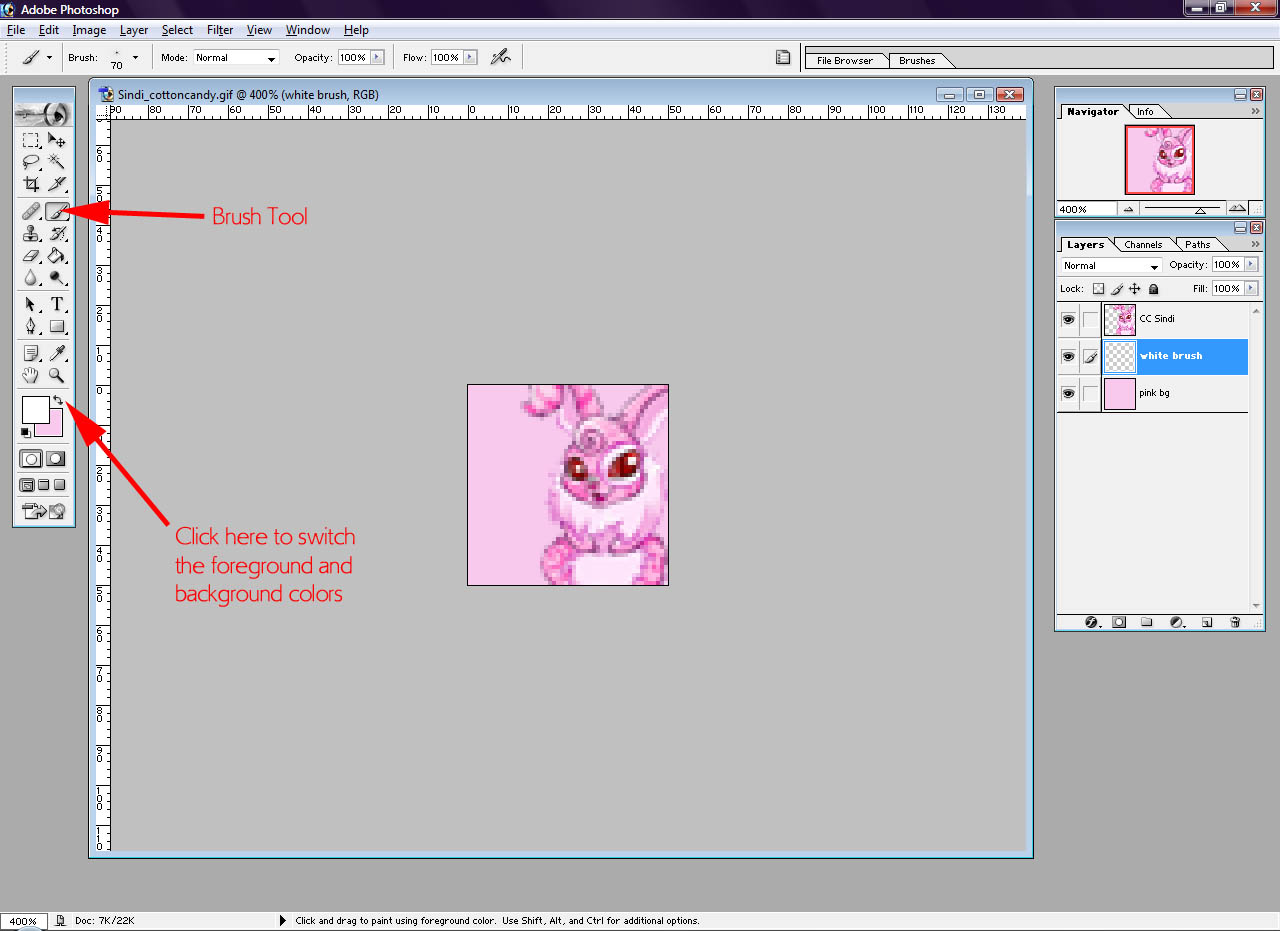
Use the Eyedropper tool to select a shade of pink from the Sindi. Select the
pink bg layer and fill it with pink. Switch your foreground and background
colors (see screenshot). Create a new layer and name it white brush.
By the way, now is a good time to save your project as a .PSD file. Remember to
save and save often!
-
Select the Brush tool (it might be under the Pencil tool). Choose a brush and
use it on the white brush layer. This will break up the background so it's
not solid pink.
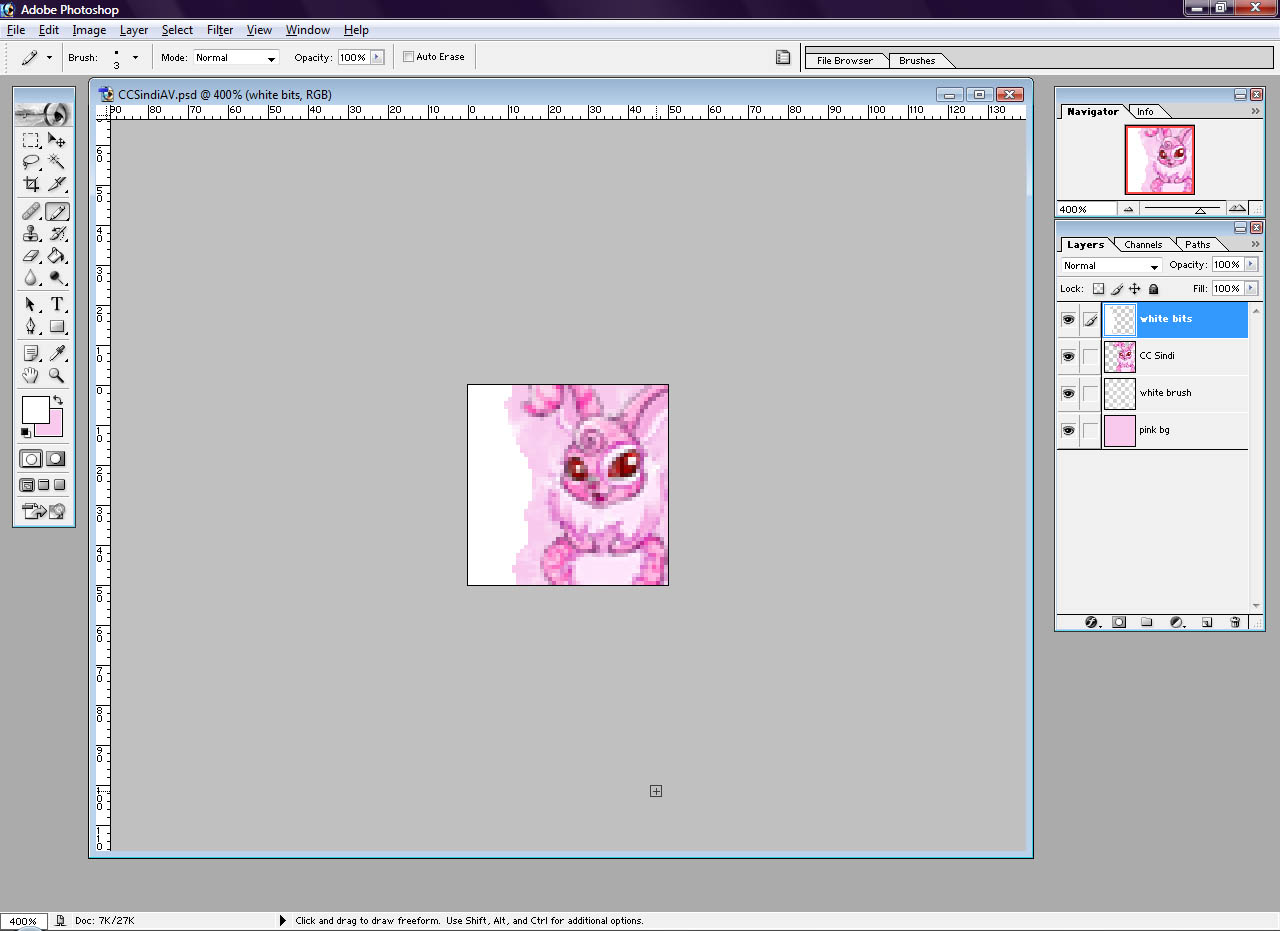
Create a new layer and name it white bits. Using white (#FFFFFF) and the Pencil
tool (set to 3px) draw on the left side of the image.
-
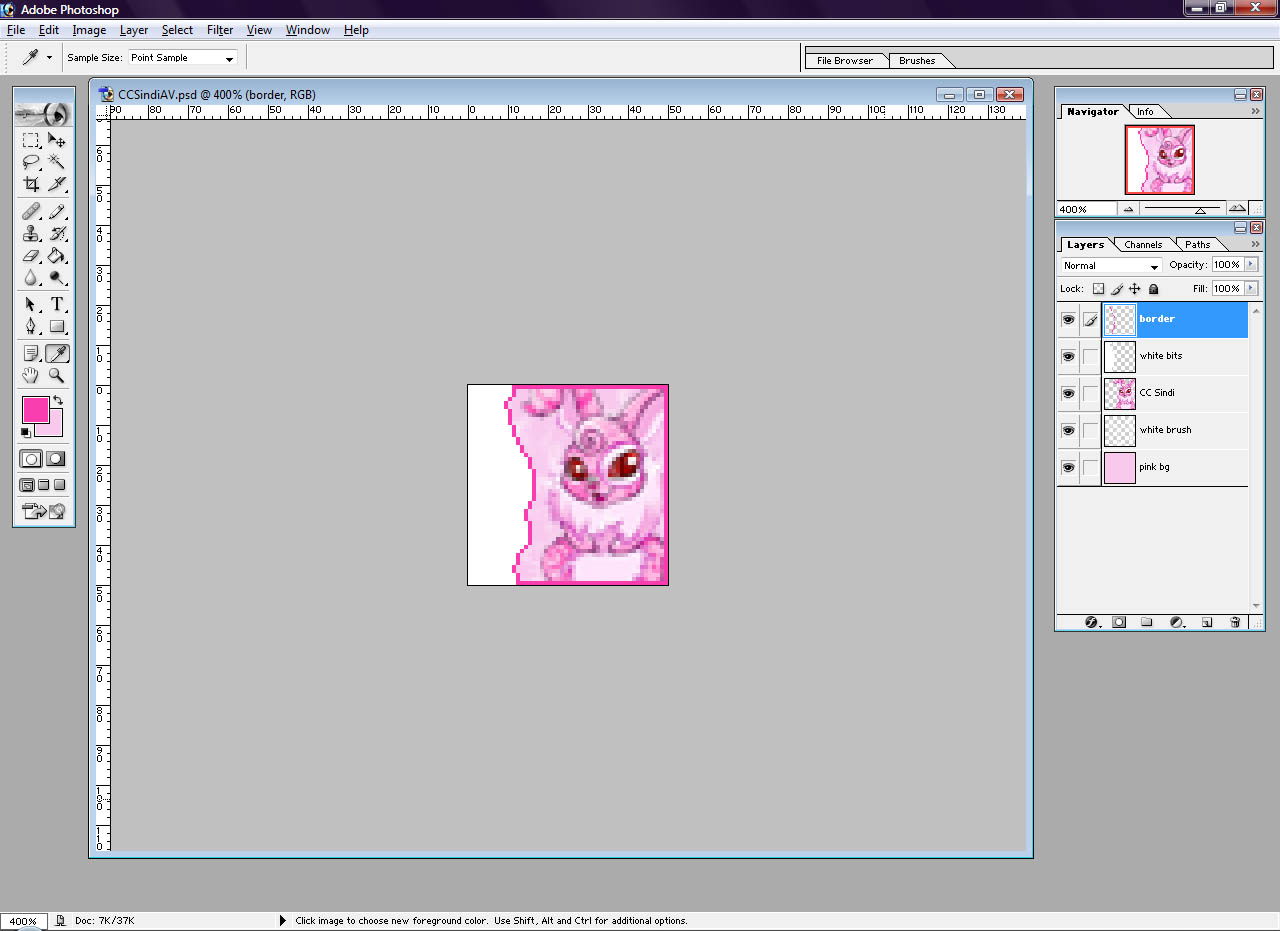
Using the Eyedropper
tool, select a darker shade of pink.
Create another new layer and name it border. Next, hold down the CTRL key on your
keyboard while left-clicking on the white bits layer. Make sure the border
layer is active then go to Select > Inverse followed by Edit > Stroke.
In the options box, change the settings so the stroke is 1 px wide and on the inside of
the selection. Once you have the border to the avatar, go to Select > Deselect.
-
Now it's time to add some text. First, change the foreground color to white (#FFFFFF).
Next, click the Text tool and use a bitmap font (I'm using 04b03, available at
dafont.com. I set the font size to 8pt, set the
anti-aliasing to none and aligned the text to the left.
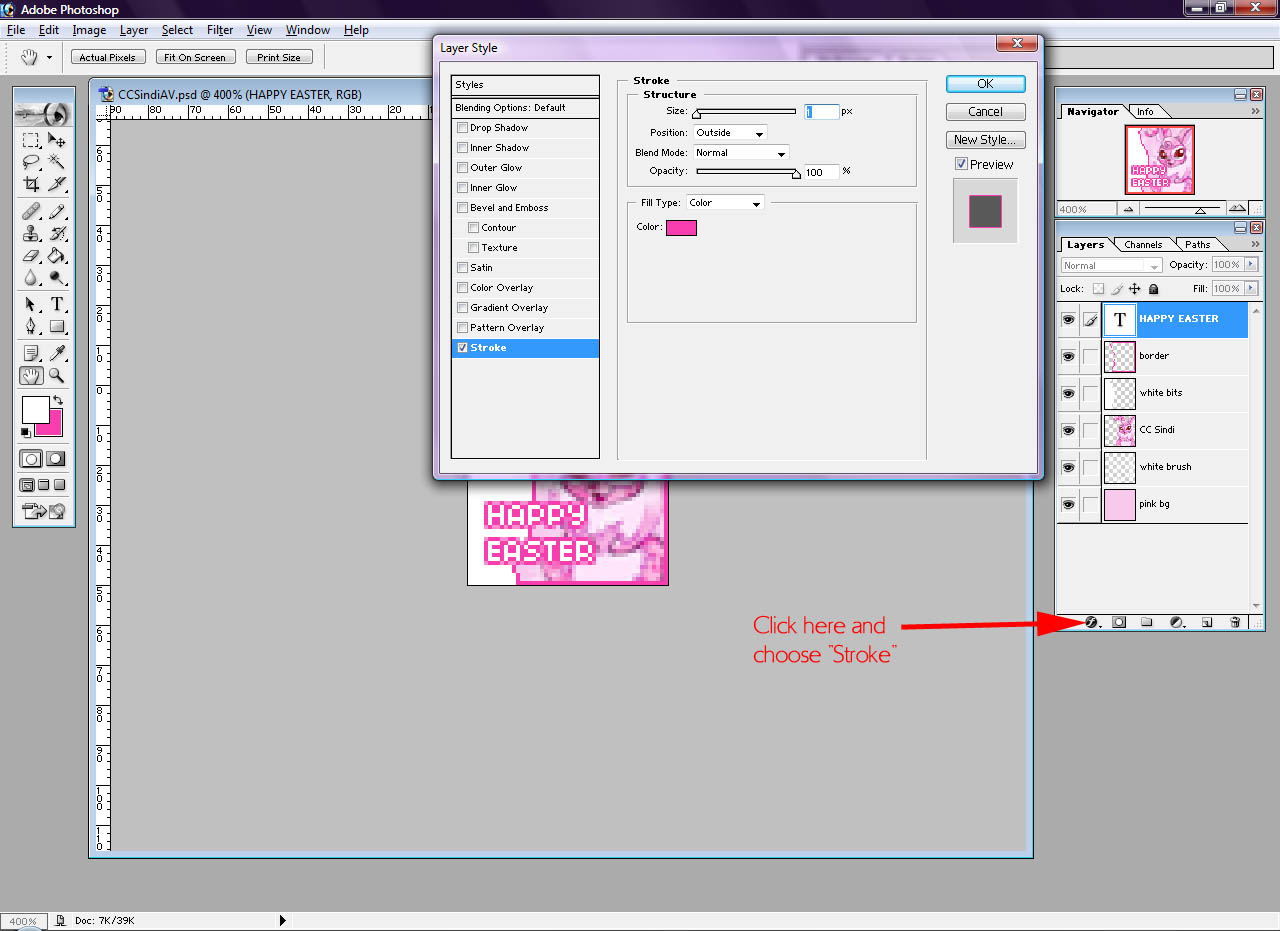
Type HAPPY EASTER onto your avatar as shown in the next screenshot. This will create
a new Text layer. While the Text layer is selected, click the Layer Style button (see screenshot)
and select Stroke. Use the same color as the avatar border, reduce the size to 1px and make
sure Outside is selected.
-
I didn't like the way the text looked so I moved EASTER to the right by inserting a couple spaces.
Next, create a new layer but don't rename it. Change the foreground color to cyan or any other color you
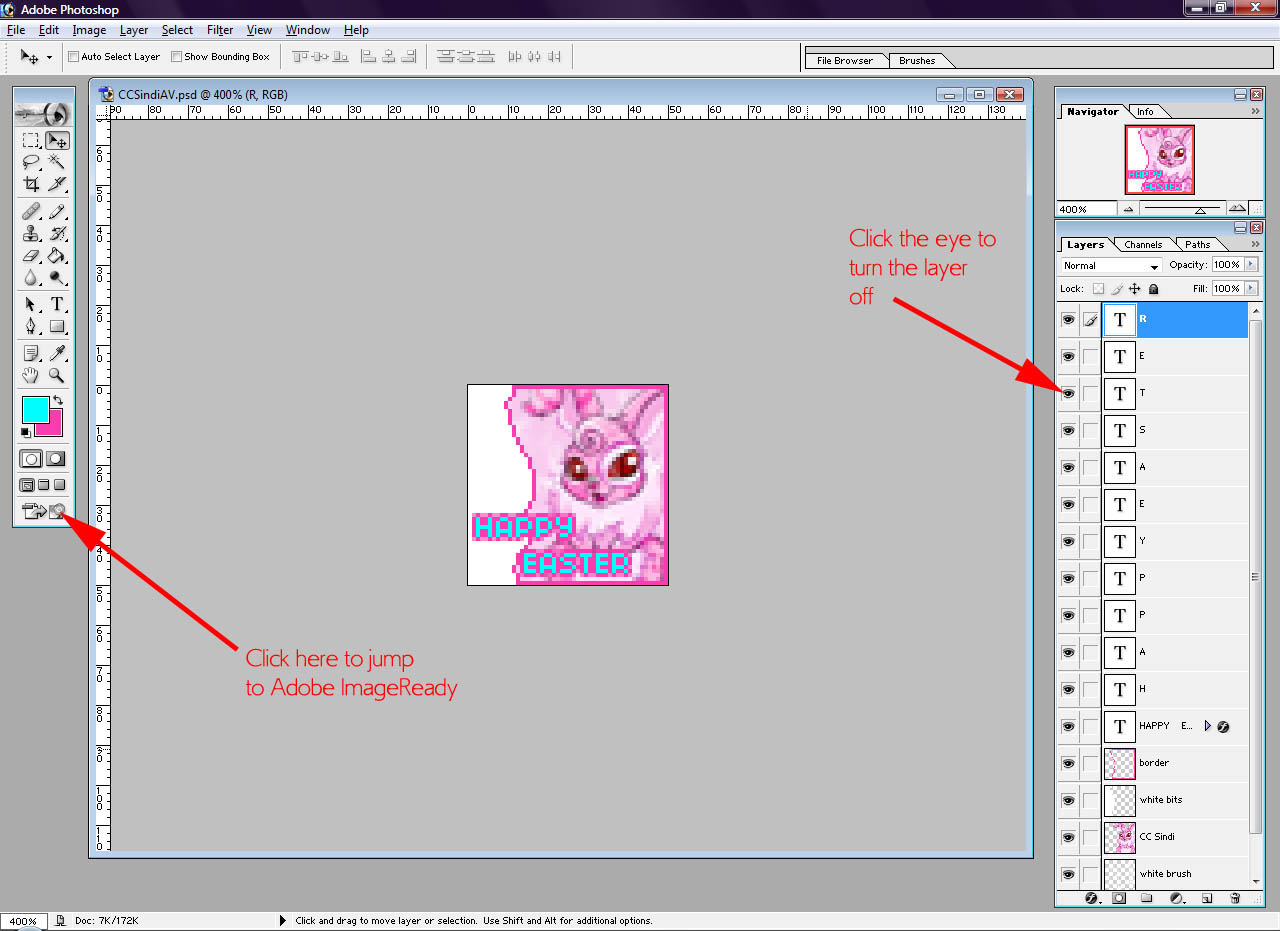
want to use for the animation. With the new layer active, type H. Then move the H layer so
it's directly over the H in HAPPY EASTER. Create another new layer, type A then move
it so it's directly over the A in HAPPY EASTER. Repeat this until you've completely spelled
out HAPPY EASTER in cyan (or whatever color you selected). Turn off all the layers you just created and
jump to ImageReady (see screenshot).
-
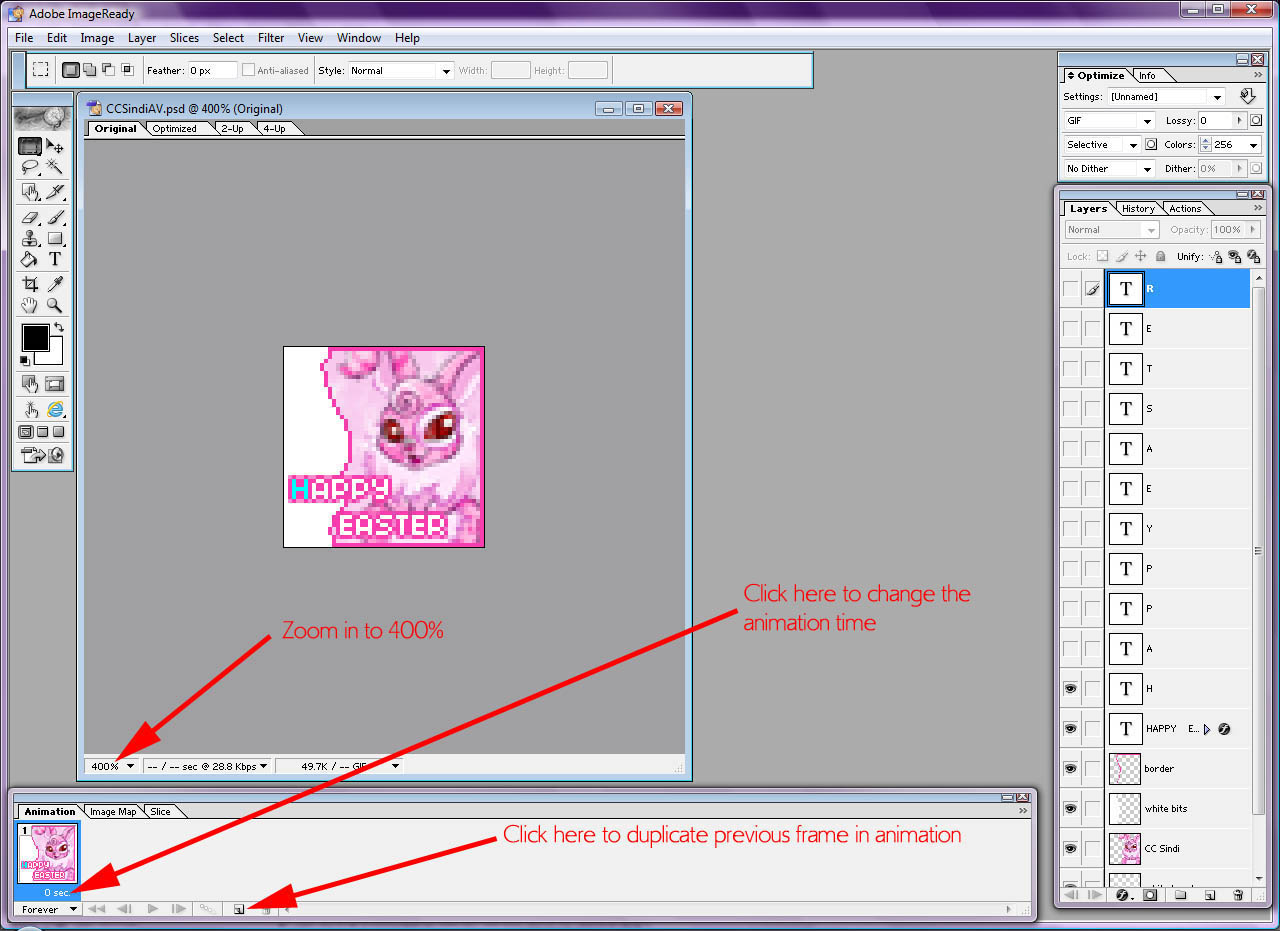
Zoom in to 400% and in the first frame of the animation, change the time to 0.1 seconds. Then turn on
the H layer.
-
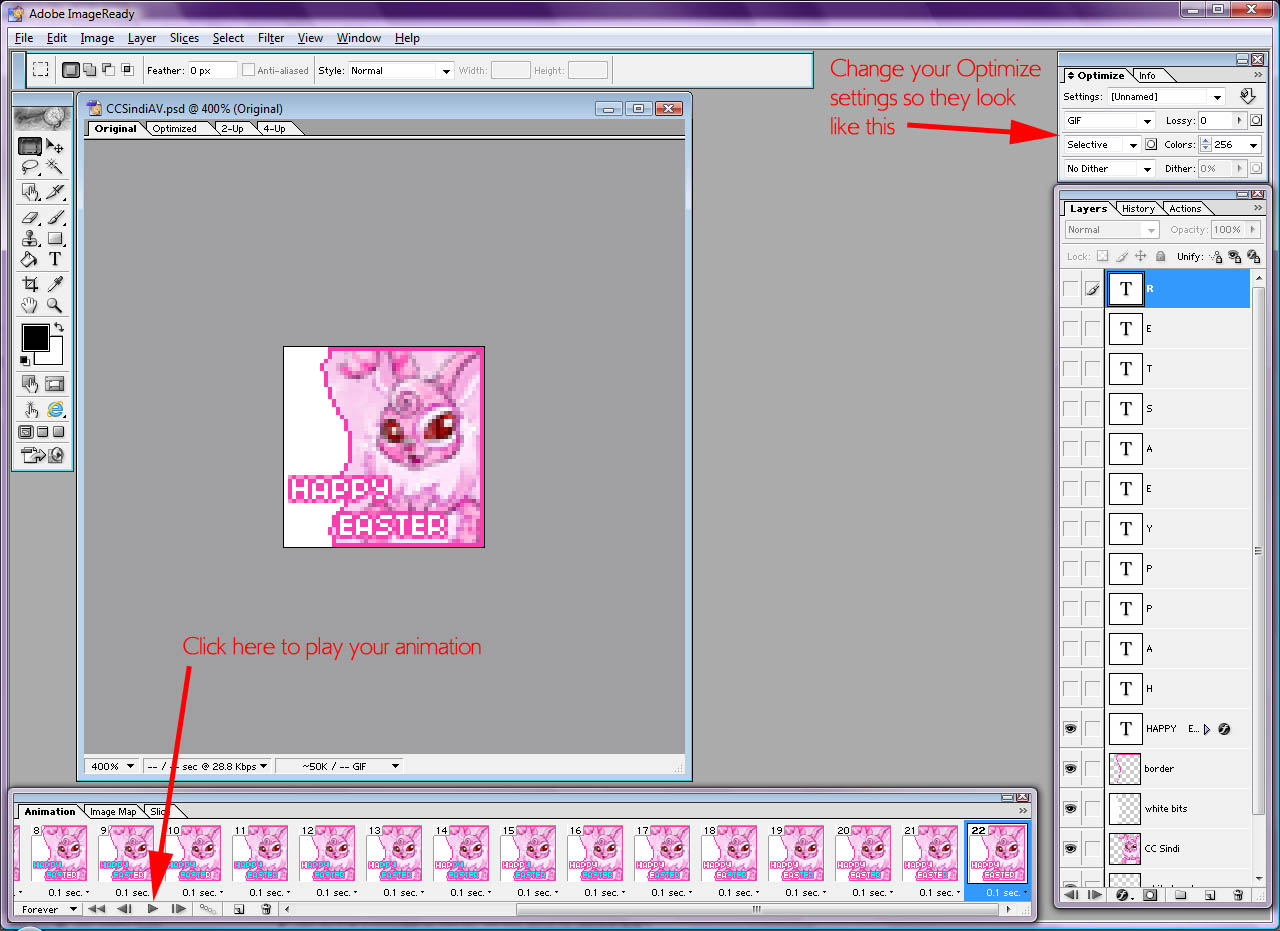
Duplicate the first frame and turn on the A layer. Continue duplicating frames and turning on layers
until your animation is complete. Once you're done, you can click the Play button to see your avatar
in action. Stop the animation and make sure your Optimize settings are the same as I have mine in the
following screenshot. Then go to File > Save Optimized As and save your animated .GIF. Close the
image in ImageReady and go back to Photoshop. Close and save the .PSD.
You're done!
- CS versions of Photoshop have the animation built-in so there's no need for ImageReady. Everything else should be the same.
- The GIMP version of this tutorial is here.
- Please do not duplicate any part of this tutorial without the permission of tishalook.
- Can't get your avatar quite right? Feel free to contact me for help.
|